
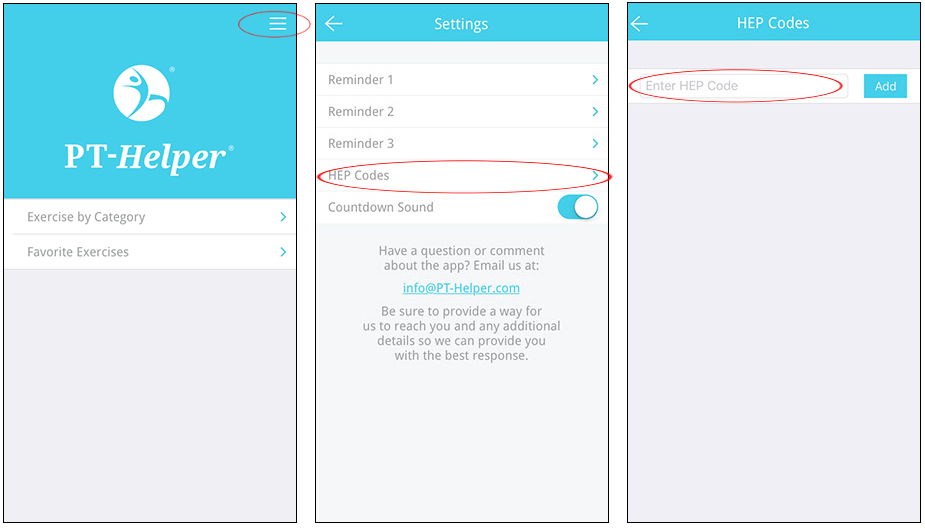
Selecting ![]() at the top right of the screen will send you to the Settings page.
at the top right of the screen will send you to the Settings page.
Further selecting ![]() will send you to a page where you can enter your HEP code provided to you by your therapist using PT-Connect.
will send you to a page where you can enter your HEP code provided to you by your therapist using PT-Connect.
Adding a valid HEP Code will result in your therapist’s company name and the therapist’s name being displayed as shown in the example below. Verify that you have entered the correct HEP code and your therapist’s name appears.
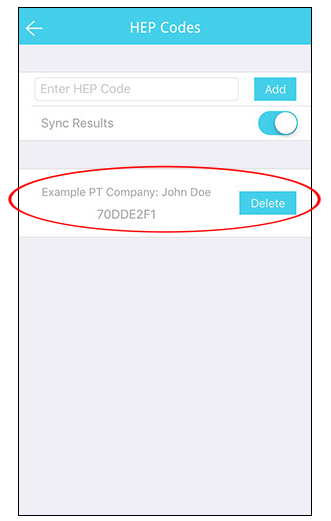
In addition, the Sync Results field will appear which provides you the ability to send exercise completion results back to your therapist. Information transmitted will include date, time, and exercise completed. The default configuration for Sync Results is ON. If you turn Sync Results OFF, no exercise completion data will be sent to your therapist.
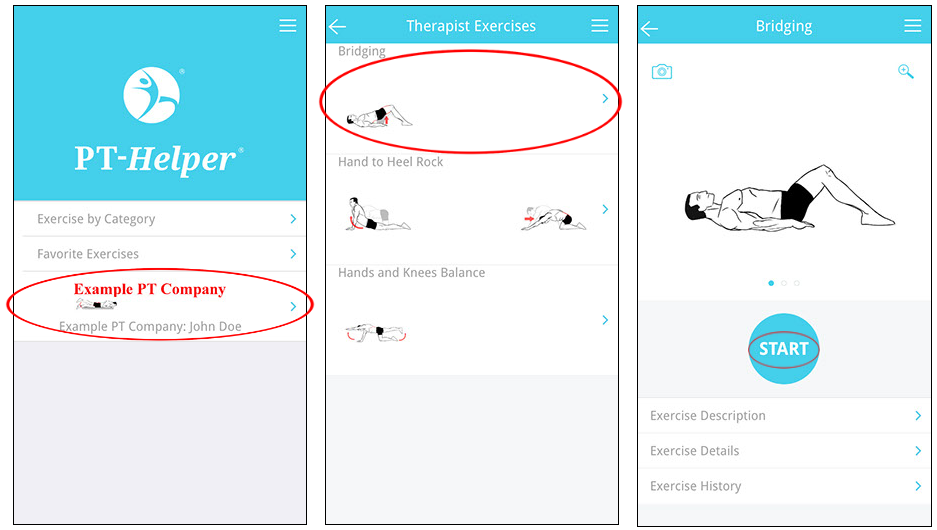
Once a HEP Code has been successfully entered into PT-Helper, the therapist’s company logo (if provided), company name, and therapist’s name will be displayed on the home page of PT-Helper. See the example below.
To go to your prescribed exercises, select the company logo or company name. PT-Helper supports only one (1) HEP code at a time. If you want to be able to use multiple HEP codes, please download PT-Helper Pro which supports entering multiple HEP code for different injuries and multiple therapists.
Select your first exercise and press Start to begin your exercises.
Additional information on exercise parameters can be found here.
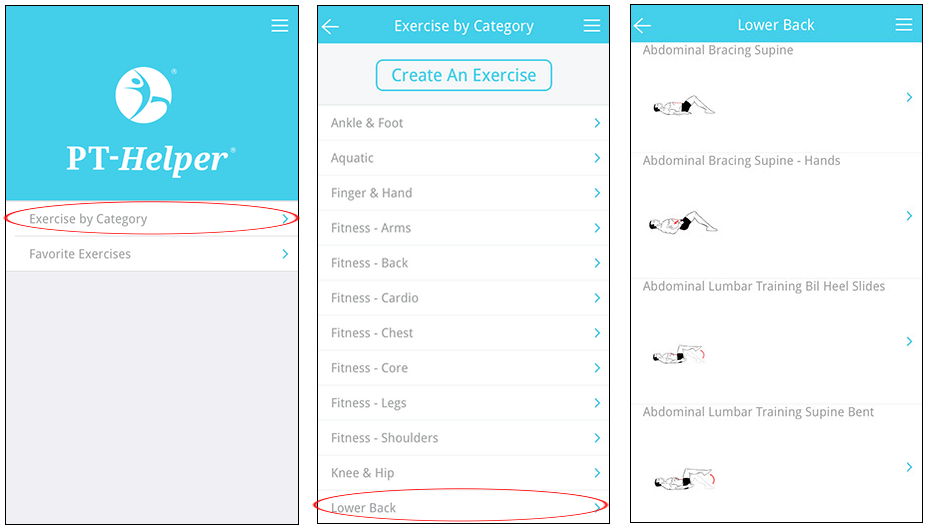
You can scroll the pages up and down to view the complete list of available categories and exercises.
The exercise lists will include the exercise name and one or two icon images. Note that some exercises prescribed by your therapist may have different names than the same exercise within our library. It may be necessary to open the exercise to view the exercise details and check that the exercise is the same one as that prescribed to you.
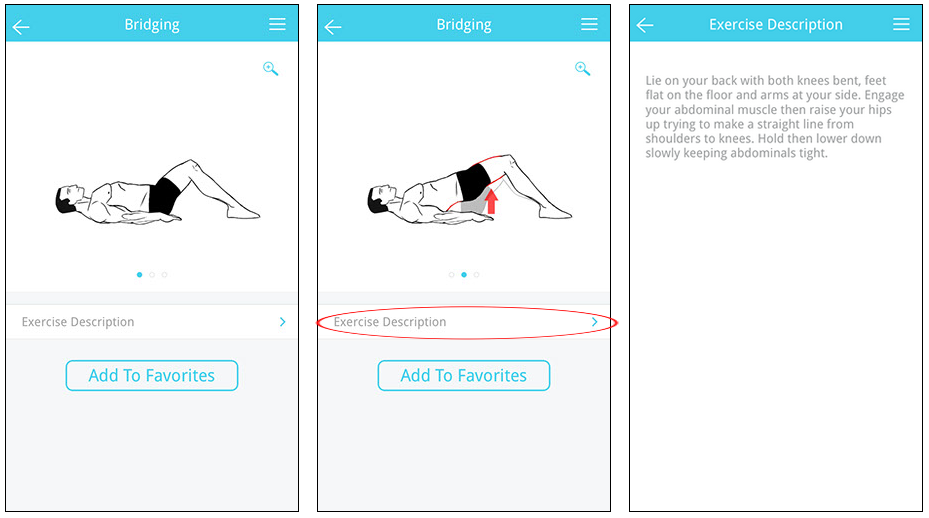
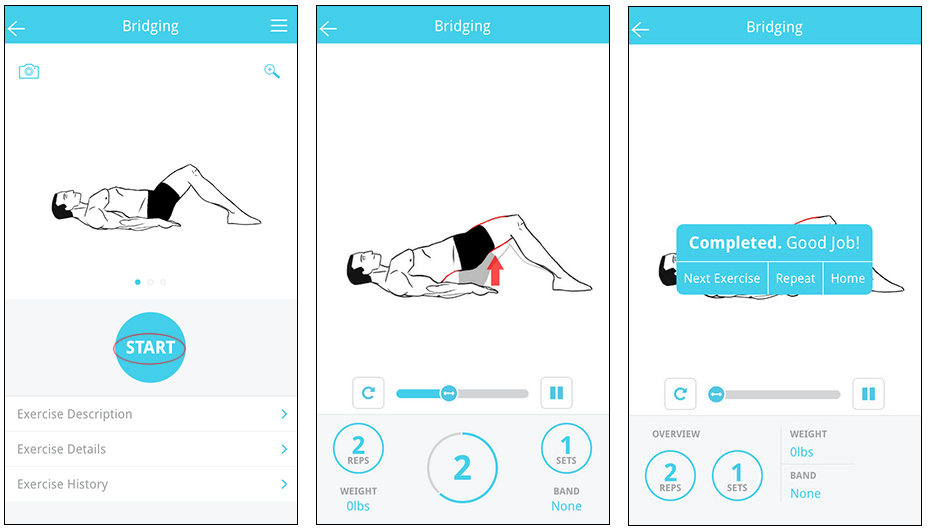
When you have identified an exercise that you want, select the exercise. In the example below, the exercise Bridging was selected. For most exercises, you can slide the image left or right to view the motion sequence of the exercise. This can be seen in the left and center screenshots below.
You can also select ![]() to view the written description for the exercise as shown in the right most screenshot below.
to view the written description for the exercise as shown in the right most screenshot below.
Select ![]() to add the exercise to your Favorites list. The exercise screen will be updated to reflect that it is now a part of your Favorite list.
to add the exercise to your Favorites list. The exercise screen will be updated to reflect that it is now a part of your Favorite list.
Select ![]() to view and set the exercise parameters to match that prescribed to you by your therapist. Make any required changes, then press Save. Additional information on exercise parameters can be found here.
to view and set the exercise parameters to match that prescribed to you by your therapist. Make any required changes, then press Save. Additional information on exercise parameters can be found here.

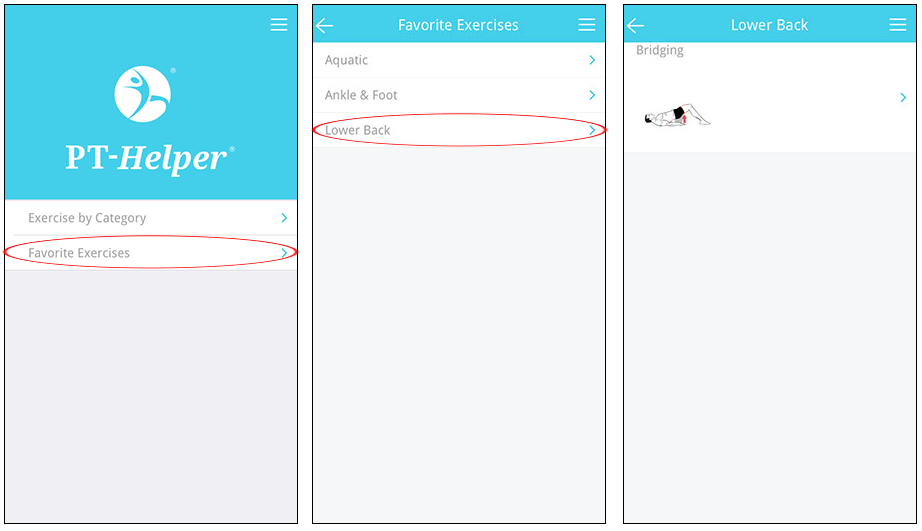
Once you have added all of your recommended exercises to your Favorites, you can return to the Home page. Select ![]() . Exercises added to Favorites will be placed into their respective categories. Select the Exercise Category that you wish to complete. Select your first exercise and press Start to begin your exercises and follow the program that you created.
. Exercises added to Favorites will be placed into their respective categories. Select the Exercise Category that you wish to complete. Select your first exercise and press Start to begin your exercises and follow the program that you created.
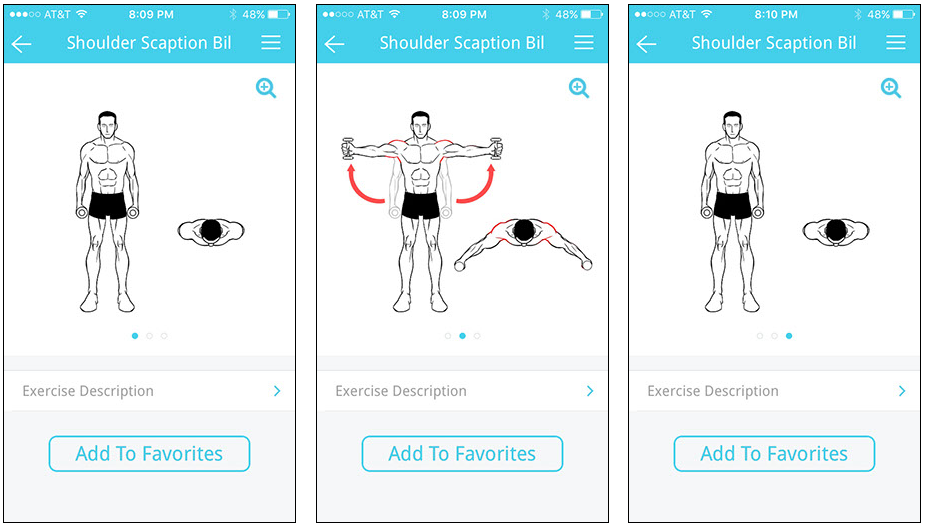
Each exercise will have multiple pictures to illustrate how to perform the exercises. Sliding the exercise illustration left or right will present additional pictures depicting correct exercise form.
Shoulder Scaption Bil is used as an example below. It includes 3 illustrations, starting position, active (Hold) position and recovery position.
For dynamic exercises, the active (Hold) position is often used to represent the concentric contraction (muscle shortening) phase while the recovery position is used to represent the eccentric contraction (muscle lengthening) phase of an exercise.
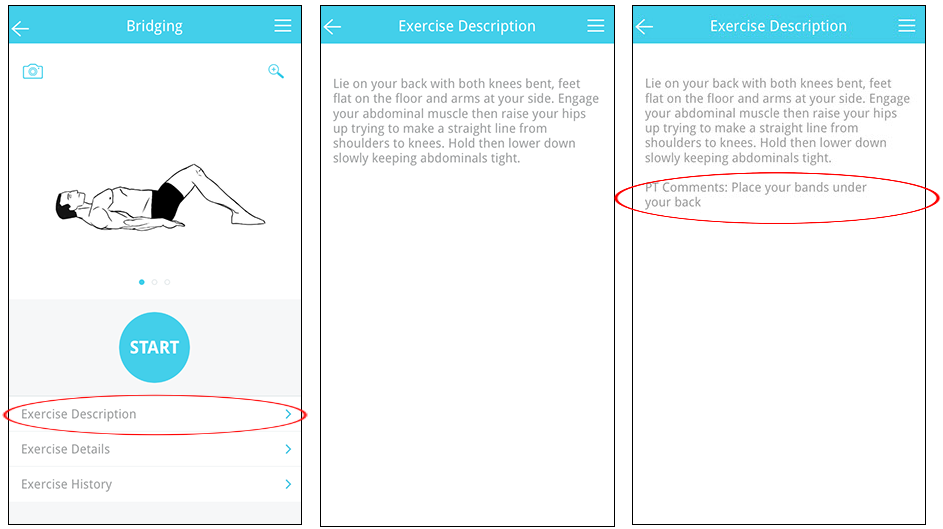
Each exercise includes a written description which can be viewed by selecting ![]() . In the Bridging exercise example below, the center screenshot displays the default Exercise Description. The right most screenshot shows the Exercise Description from within a HEP exercise which includes the PT Comments field that was added by the therapist.
. In the Bridging exercise example below, the center screenshot displays the default Exercise Description. The right most screenshot shows the Exercise Description from within a HEP exercise which includes the PT Comments field that was added by the therapist.
Once an exercise is added to your Favorites, additional fields will appear below the Start button. Select ![]() to be able to modify the exercise parameters: Hold Time, Recovery Time, Rest Time, Weight, Repetitions, Sets, Sets per Day
to be able to modify the exercise parameters: Hold Time, Recovery Time, Rest Time, Weight, Repetitions, Sets, Sets per Day
The values to these fields can be changed by clicking on the value and then changing the value using the pop-up keypad.
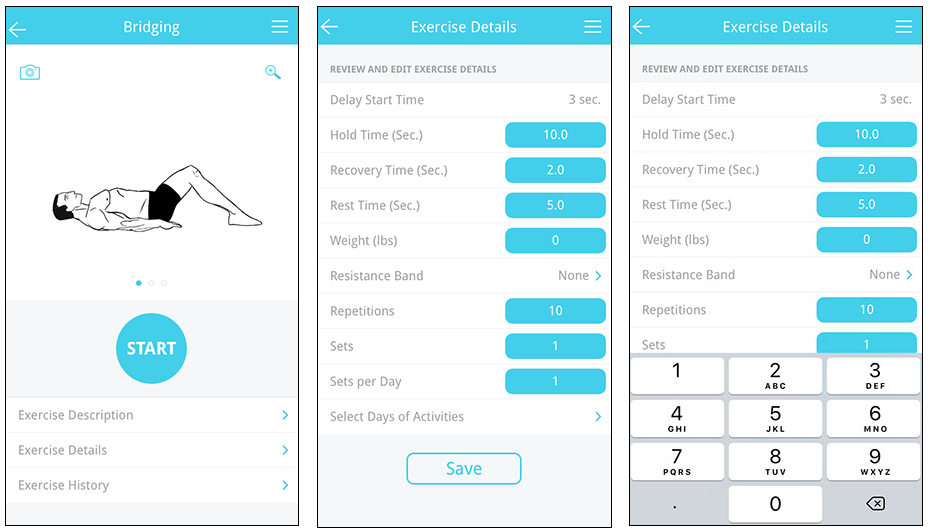
- Hold Time: For stretching exercises, this is the period of time you should hold the stretch. For dynamic exercises, this is often the period of time allocated towards the concentric contraction (muscle shortening) phase of the exercise.
- Recovery Time: The period of time between Hold Times for each repetition. For dynamic exercises, this is often the period of time allocated towards the eccentric contraction (muscle lengthening) phase of the exercise.
- Rest Time: The period of time between Sets of an exercise.
- Weight: When appropriate, the weight that should be used with the exercise.
- Repetitions: The number of repetitions for each set in the exercise.
- Sets: The number of sets for each exercise.
- Sets per Day: For exercises that are to be repeated multiple times in a day.
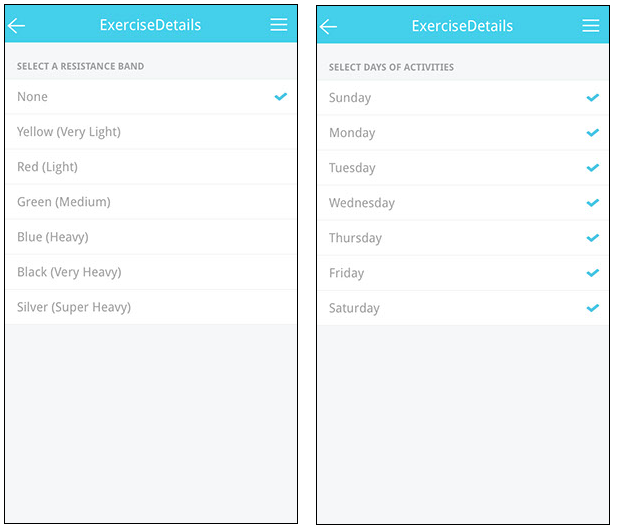
Resistance Band and Select Days of Activities have their own selection screens.
To begin an exercise, press Start. There will be a 3 second delay period (beeps each second) for you to get ready before the exercise begins. There are unique tones for the start of Hold, start of Rec, start of Rest and the end of an exercise to make it easy to follow along.
Throughout the exercise, you can pause the exercise at any time to rest or if you are interrupted during the exercise by pressing ![]() .
.
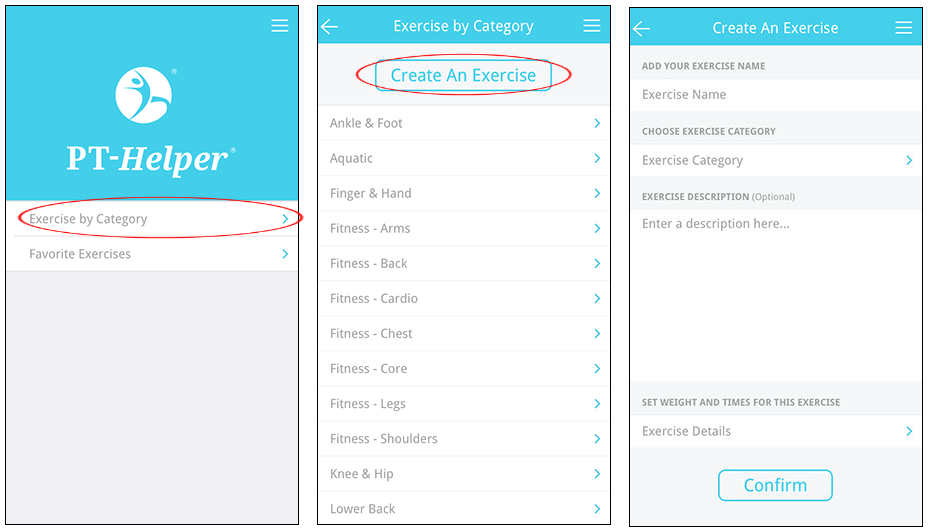
For the scenario where you are unable to locate an exercise in our library that matches one of your prescribed exercises, you can create your own exercise. From the home page, select ![]()
On the next page, select ![]()
You will be able to complete the form to create an exercise as depicted in the screenshot on the right (below). You will not be able to add pictures to appear within the exercise but can create the necessary timing to help you complete your exercises.
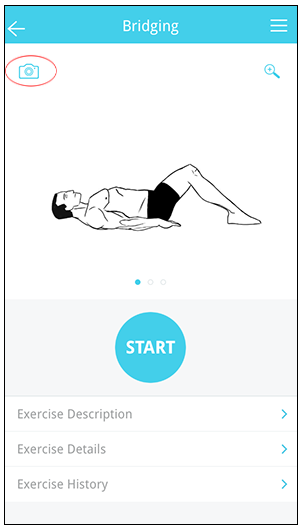
Exercises within Favorites or a HEP program will have a camera symbol on the top left of the screen. Select ![]() to enable the camera controls to take a picture or video. Pictures or videos will be attached to an exercise and will appear at the front of the images.
to enable the camera controls to take a picture or video. Pictures or videos will be attached to an exercise and will appear at the front of the images.
Alarm Clock Notification
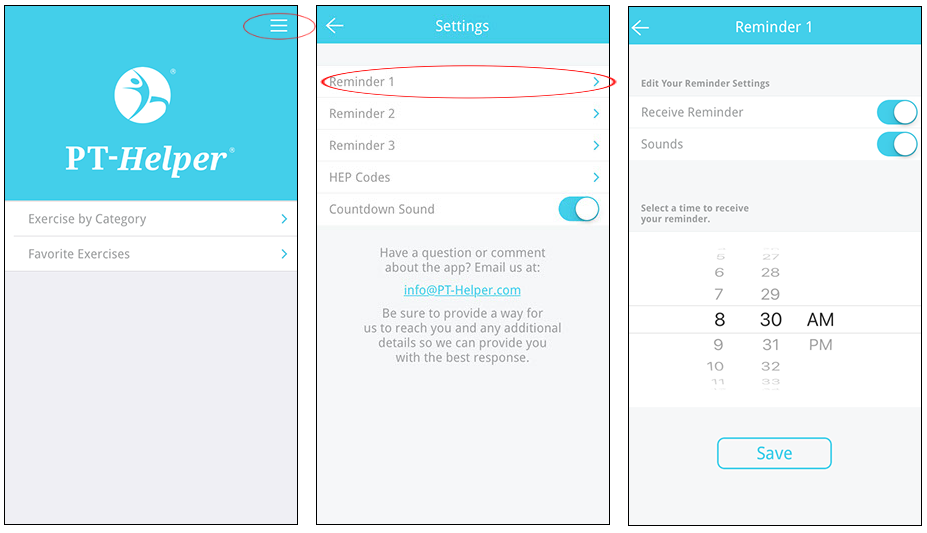
PT-Helper also provides three simple alarm-clock-style notification to remind you to do your exercises. Select ![]() at the top right hand corner of the screen.
at the top right hand corner of the screen.
Press Reminder 1 to set up your preferred reminder time. Set your preferred reminder time and press Save at the bottom of the page.
HEP Code – Home Exercise Program (HEP) code. How to enter your HEP code.
Adding Exercises to Favorite – adding exercises to your Favorites to create your own home exercise program.
Exercise Parameters – how to modify exercise parameters to match your prescribed exercises.
Create An Exercise – create your own exercise within the mobile app.
Adding Pictures and Videos to Exercises – add pictures and videos taken on your mobile device to exercises.
Alarm Clock Notification – set a reminder to do your exercises.